Showing posts with label guest post. Show all posts

Thursday, October 20, 2011

All About Witch Shoes


Just in case you missed our fun tutorial  for The Monster Craft Bash
we'd thought we'd post it again.
 We have a soft spot for anything Halloween,
and it's pretty obvious we have a fetish for Witch shoes too!
If you have wanted to try your hand at decoupaging
there are some great tips you want to take a peek at!
This project is pretty simple and unlimited for your imagination!
We knew we loved witch shoes...
but there's something about those socks that are so funny!
You will need some witch shoes cut from 3/4" MDF or pine,
 a 22" section of 2x4" wood,
Mod Podge, scrapbook paper and embellishments.
We grabbed our paper from Hobby Lobby and used K&Company,
which by far has the cutest Halloween paper that we love!
First we drew up some styles we really liked
and sized them to fit together.
We don't have a clue how to do free printables-
but feel free to blow up these pictures on your computer screen
and trace away!:)
These shoes range from 6"-9" tall and about 6" wide.
Ideally you'll need a scroll saw to cut these babies out.
They aren't hard to cut out, I promise!
Second, you'll need to base coat them with a coat of paint.
We always do a 2/1 ratio of paint with water.
The water helps the paint go on smoother with no globs.
Third, trace your shoe shapes right side down with pencil
and cut out each shape.  It's okay to leave a little overhang
which you'll next sand off.
For the sock we cut strips of colored paper and glued them onto white card stock
to create the perfect witch sock.
Another little tip~make sure to pre-cut your "sock" to the edge of the shoe.
That way you won't have a weird bump overhang that you glued over.
Using a very thin coat of Mod Podge, adhere your paper into place.
If you put it on too thick your paper will buckle.
Make sure to rub it all over and especially along the edges to ensure good contact!
Now it's time to sand the edges off!
This is what gives the shoes a painted on look!
You can pick up inexpensive files at your local hardware store for just a couple of bucks
and they are a must for these curly shoes!
You can also use a nail file to get in those tiny spaces.
We cut our lettering out with our Cricut
but you can write it on with a paint pen easily too!
We used Mod Podge to adhere the lettering to the board.
Now here's the fun part!
Tie on any and all embellishments to your heart's desire!
You seriously can't go wrong with these!
We even drilled some holes to lace up which was easy and fun.
Need some buckles?
We cut ours out of scrap cardboard and then glittered them
That stuff is gorgeous!
We even added some to the spider for pop.

Then just wood glue your shoes into place and
you've got a fabulous Witch Shoe centerpiece anyone would envy,
cuz ya know.....It's All About The Shoes!
Make sure to check out all the other great Halloween ideas
for the Monster Craft Bash!
They are to die for!
 hee hee....Sorry, I couldn't resist!!

Wednesday, February 2, 2011

Pottery Barn Art Boards

In case any of you guys missed our guest post over at Infarrantly Creative
we thought we'd post it again here at home!
Here's our latest project we've been working on.
Do you recognize these???
Here's our source of inspiration~~
These bad boys go for $169 a piece, yup each, so that would be a
grand total of $676 for 4.
Let me go grab my wallet......  
Yeah.
So here's where we started.
We printed off the picture and tried to measure them to scale.
If you don't own a quilting ruler, go get one, they are so useful!
We got 7 2x4 foot 1/4 inch MDF boards.
Home Depot was so good to cut everything out for us!
We used printer paper to make our patterns, which worked great
since it was already 11" high, we taped 3 sheets together to fit the 24" width
of the board and eyeballed the rest from there.
2 of the boards were cut into 3" slats,
1 was for the house tops
and the 4 remaining were for each house base. 
Each school house was 48" high except for the red one so we modified the pattern
to maximize the use of our boards.

I know looking at these it might seem overwhelming but remember...
YOU CAN DO IT!!!!
We know a lot of us get a bit nervous around tools,
but we Crafty Sisters really want to encourage you not to!
The jigsaw was one of the first tools we tried and it's pretty user friendly!
For this project you'll need:
A jigsaw, a drill, liquid nails or wood glue, paint,
sand paper and some clamps would be really useful!
(Although I have to admit my pantry was completely raided to clamp all of these down!)
We made the top portion 11 inches high.
Side slats were cut at 35 inches, the bottom was 24".
We used some 1x2" trim moulding for the chalk tray at the bottom.
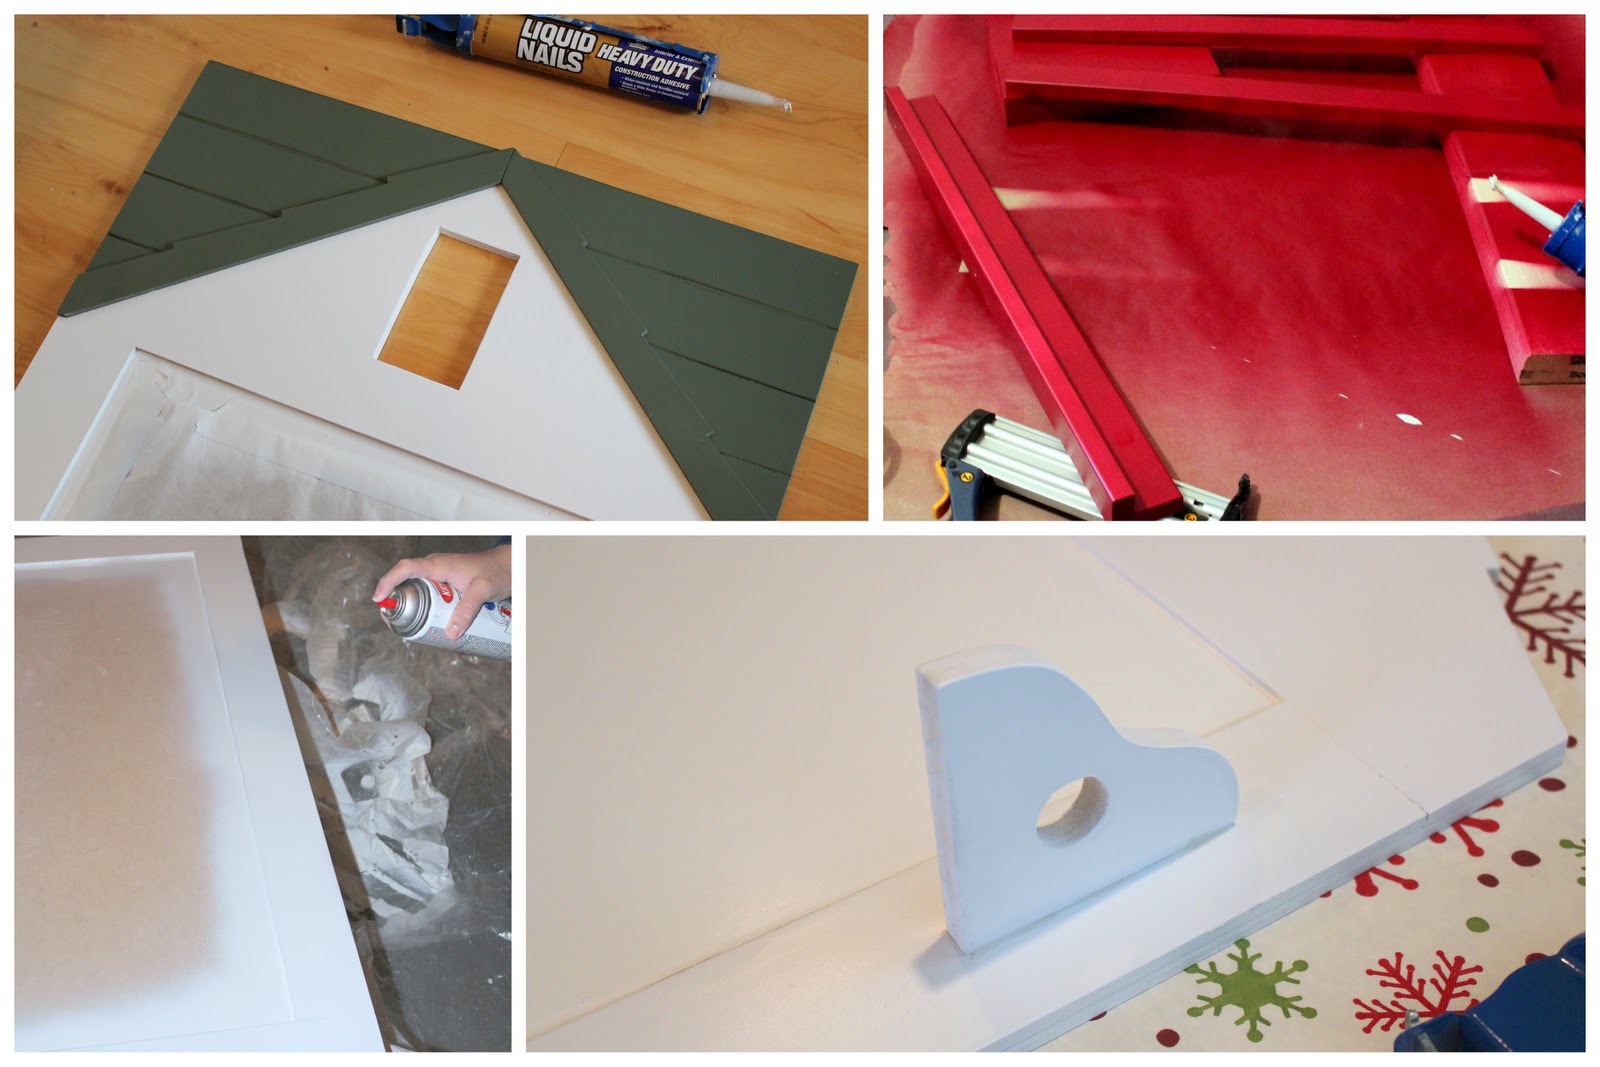
It's easier to be exact with the roof line by layering the top piece,
 gluing it to the main house and then cutting it exactly. 
Less cuts, nicer finish.
Spray paint works best and gives the best finish!
Did you know that if you lightly sand between coats
it will make your finish look even better?!
Also following the directions on the back is always good (note to self).
Don't get too close and glob the paint.
It's better to do several thin coats then ruin it with one globby one.
Spray painting in cold weather isn't fun.
It stinks. Literally.
We're hoping the hubby doesn't notice the over spray of red on the garage floor.:)
Each house was then either inlaid with dry erase board,
cork board, or painted with chalk board paint. 
If using chalk board paint we recommend pre-painting the side slats and
then gluing them into place so you don't get chalkboard paint all over them.
Scared to cut dry erase board?  We were too!
Luckily we remembered a great tip we saw used on trimming doors to protect them from chipping:
Make sure to tape along the line before you score~
this will eliminate any chance for the finish to chip and flake up!

We also found a roll of white craft paper to hang from a dowel that
was held on by little corbels we made that attached to the base.
A little liquid nails holds everything in place
and spray adhesive worked great for the cork!
We attached "d" rings to the back for easy hanging.
All these things can be found at your local craft and hardware store.

We had to make one in pink for Nicole's daughter to display her
artwork and to organize her jewelery!
Candace's boys didn't need any coaxing to try them out either!
 These were pretty fun to make and actually pretty easy
but more importantly our kids love em'!
Plus our grand total was just over $75.
That's total....for 4!
Pretty fun huh?
Now, what to do next.....

Thursday, March 4, 2010

Guest Posting at 2Sisters 2Gether

Thanks to
....another set of crafty sisters!
They are
*TWIN* Sisters
 over at
 These lovely ladies invited us over to guest post on their blog today.
 They have a fun site full of cute crafts,
yummy food,
 and all sorts of great ideas!
 Head over and check them out!
Related Posts Plugin for WordPress, Blogger...