Sunday, November 28, 2010

A New Ginger Man

Here are some wood projects from a few weeks ago. I need to get my Christmas crafting wind back to decorate my house...I think I lost it after eating all that pie! :) I am currently "borrowing"  my dad's belt sander. It scares me, but it is great for wood crafts.  It quickly gets the job done and can quickly take the skin off your fingers!  Perfect for rounding out the Gingerbread parts.  My friend Angela gave our family this gingerbread man, that has been well-loved by my boys for 7 years.  One of them even practiced their writing on him. Nice. The boys look forward to pulling this guy out every year.  I think Angela bought kits, and then decorated them herself.  Cute idea.
He was looking scraggly..so we traced and cut out a new Gingerbread Man.  At first he didn't have a mouth and for some reason that really upsets my young kids...not sure why? I later added a mouth topped off with two small peppermint candy beads.
I think he's a door hanger, at least that's where we stick him.
We found all the candy decor, rick rack, cinnamon sticks, and ribbons at Hobby Lobby.  Everything is going fast, I can't believe it! To give him a sugared look, we sprinkled clear glass glitter over Mod Podge.

While I had the belt sander out I had to make Under My Polka Dot Umbrella's cute 2x4 snowmen. Nicole found her site and adores her wood crafts.  Have you seen the super cute stuff she makes with simple 2x4's? Really....really easy to make. I love the tree too!  Go check it out!
We'll be back soon with more Christmas ideas!

Wednesday, November 24, 2010

Happy Thanksgiving~ and a Pie Crust Recipe too!

I bet most of you have already made your pies, except for a few procrastinators....like me that just pulled two pies out of the oven at 11:00 p.m.  So here's a recipe to file away for another day.

Our mom is pretty much an expert in pie making..at least we think so!  She once made 21 pies to feed a group of missionaries.  Mom was recently roped into teaching a pie making class for the ladies at church.  She had all the information gathered so nicely that we thought we would pass it along to you!

Mom's 9-Inch Double Pie Crust

Ingredients
2 3/4 cups flour
1 teaspoon salt
1 cup shortening
¼ to ½ cups ice-water
Directions

  • Mix together flour and salt in a large glass mixing bowl. 
  • Add the shortening and cut it into the flour with a knife and fork. 
  • Continue cutting in the shortening with the fork
  • until pea size crumbs form or it looks like coarse meal. 
  • Gently sprinkle in ice water, half at first, then just enough to bring dough together.
  • Divide dough into two equal parts.
  • Wrap each half amply in plastic wrap.
  • Press the dough together to form two flat round disks.
  • Place the dough disk in the center of a flat sheet of plastic wrap on the counter.
  • Sprinkle top lightly with flour and the rolling pin as well.
  • Roll out the disk of dough 2-3” larger than pie plate.
  • Roll the dough evenly from the center to the outer edge.
  • Lift and turn over the dough and the plastic wrap and lay it across the pie plate.
  • Ease the dough down and press it into the insides of the plate to prevent stretching.
  • Gently peel off the plastic wrap.
  • Cut away overhang with a knife to ½” larger than plate.
  • Roll out upper crust on top plastic wrap.
  • Lift and turn over the dough on the wrap and gently lay it over filled shell.
  • Arrange the position of the dough and gently peal off plastic wrap.
  • Cut away the overhang to 1”, tuck it under lower edge and crimp or flute the edge.
  • Cut decorative slits on top to form steam vents.
  • Brush the top with milk or cream and sprinkle with sugar. 
  • Bake at 375 degrees for 45 to 50 minutes. Cool 1 hour to set filling. 
For
blind baked pie shells,
 prick or dock the bottom shell with a fork and bake at 375 degrees for 15-18 minutes.
 Prick any bubbles that form while baking.
To prevent crust bubbling you may line the crust with tinfoil and fill with 2-3 cups of dry bean (or pie weights) for the first 12 minutes of baking then lift out the foil and beans by the four corners and finish baking.

Thanks Mom!

Here's a little trick Mom showed us when rolling out the pie dough.
 Sorry about the pictures, it's late and dark...and these are pies I made.
  One day I'll make pies like my mom! :)
Mom rolls her pie dough out on Saran Wrap. 
Roll it all out.... 
Pick up the Saran Wrap and dough, then flip into the pie pan. 
Then peel the Saran Wrap away.  Neat and easy trick for beginning pie makers, eh-hem...like me.

We hope you enjoy your Thanksgiving Holiday with your family and friends...and be sure to eat lots of pie! :) 

Thanksgiving Corn~Kid's Craft


While you're slaving away in the kitchen, here's a little craft to keep the kids busy.  We made these a few years ago in my son's class and it was so easy.
You will need beads, raffia, pipe cleaners cut in two, and corn husks.
I think that's a pretty good mix of authentic corn colors in the beads, don't you think?:) 
Have your little one bead them on.  He's been practicing in preschool and is quite good! 
We thought 5 rows was a good number for our corn. 
Twist the ends together. 
We dampened the corn husks before tying so they wouldn't crack. 
Tie the ends with raffia and trim it up. 
Super easy! 


This is sure to keep their little hands busy for a bit so you can bake away. 
 We'll be back later to share our mom's winner pie crust!

Sunday, November 21, 2010

Snowman Cubes

 I fell while holding my camera, taking the pine cone wreath pictures.  I stood up on an ottoman, and it tipped.  I smashed the front in.  I was able to pry the front lens back into shape enough for it to function, but the pictures are all blurry.  Santa, do you think you could send me a new camera...preferably a Canon Rebel?  I have been coveting them at Costco.  I was at a cub scout pack meeting and I spotted the Costco camera right away on one of the moms.  She asked if I would take a picture of her family while he was awarded.  One shot, and I was hooked! I was swooping in left and right capturing this great moment with their family! (he,he) I went into the camera shop to get a little info and found out they have built in HD Video.  Is that enough to convince my husband....uh, Santa? :)

So, here are some blurry pictures of these cute snowman blocks!
Ear muffs...or no ear muffs?
I made a dozen of these guys for the boutique Nicole's been involved in.  The ear muffs took some time to make, I gave up after three.  The first day of the boutique, a lady bought the three with the earmuffs. Later that night,I spent a couple of hours making 8 sets of earmuffs.  Clipping pieces of felt with wire, then attaching them to pipe cleaners.
All of them sold, except one lonely snowman I missed.
They are super easy to make. Nicole gave me a 4x4 post that we chopped into cubes.  
I gave them a good sanding, using a belt sander. (scary...but cool tool)
Chopped up some noses and glued them on. 
 I later gave them all a nose job, because their noses were too big for their face. :)
I pulled out my trusty celluclay and texturized them.
After drying, I sanded and then painted white. 
Then I added Snow-Tex.  Love this stuff. I wiped it around the edges and the nose.
Then I Mod Podged and added some glitter. These snowman blocks are really cute with plain old paint, if you don't want to bother with the texture and glitter.
I think it's really tricky making a snowman's face cute.
I have made many, many ugly snowman faces.  You can ruin it with the nose shape, or by the eyes.
 To make it easier, I found some tacks and spray painted them black.
Nicole showed me this trick of sticking them into cardboard for easy spray painting.
I drilled holes and glued the tacks into the block.
  Much easier then trying to draw a face on.  It was so funny watching my boy's faces when I would add the eyes, nose, and mouth.  The little one would point and laugh every time I added the earmuffs.  I got a kick out of watching them.
We had our first small snowfall,
my boys managed to scrape enough snow out of the yard to make their own snowman.  Cute!
Speaking of cute...here's a sample of what Nicole was making.  I had to snag a picture of her tray full of baby Jesus ornaments that sold like hotcakes!  Love these!

Tuesday, November 16, 2010

Glittered Pinecone Wreath


While I had the glitter out I put together a couple of pine cone wreaths. I spent a bundle on glitter and you better believe I'm going to use it!  Ballard Designs has a pine cone wreath that I really like. It took some trial and error to get the results I was looking for, but it finally worked! 

When searching for how the heck to attach pine cones to things I ran across the blog Casa Haus English, via Centsational Girl's Ornament Party link. Casa Haus English made her pine cone wreath using a coat hanger!  I think her wreath looks just like Ballard Designs. Perfect! Exactly what I was searching for! The coat hanger works wonderfully. My first attempt involved the use of a wire wreath form and was a bit tricky. 
To decorate the pine cones, I wiped silver craft paint on each pine cone with a brush. While the paint was still wet, I sprinkled on Martha Stewart's White Gold glitter. 
The wire lets the pine cones toss side to side, letting you adjust where needed.
The smaller pine cones that were too small for the wreath were tossed into a glass bowl.
I found a super sale on pine cones, that smell yummy too.  Michaels was clearing out their Thanksgiving pine cones to make room for Christmas pine cones.  Nicole said I should have gathered some up from her backyard.  I still may do that! :)
I tried some as ornaments too. 
 
I have to explain where I was stumped.  I don't know why it took me so long to figure out how to hook them using something stronger than hot glue.  In Target, I picked up a pine cone ornament and realized that they drilled into the pine cone.  I can do that!?
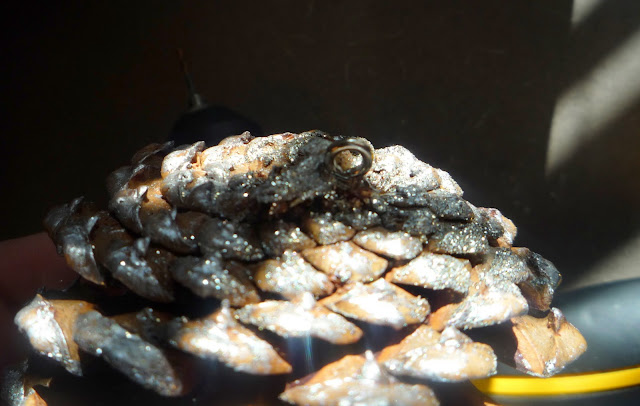
After drilling I used eye hooks on the flat back pine cones, and made longer wire hooks with the fluffier backed pine cones.  Then I added a dab of hot glue into the hole and stuck the wire in.  Magic!
 I'm sure it's been done before, but I thought it was pretty cool!
If you use eye hooks, make sure that they will fit around whatever wire form you are using.
Here's the wire hook for the "fluffy" backed pine cones.
Then you just slide them onto your coat hanger.  I used a heavier coat hanger and it was a beast to straighten.
Once all the pine cones are on, you have to tweak them to fit snugly.  I was so pleased that the wire backs held solid while adjusting. I tell ya, silly things make me happy! 

Here's the  first pine cone wreath attempt, before I learned how to drill.  I thought I would show you just in case you all are better at wiring than me.
On this wreath I used a wire wreath form, found at Hobby Lobby. 
 First I coated the pine cones with Snow Tex.  Have any of you used that stuff?  Very cool texture.  You can water it down until you get the consistency you desire.
Then, I added glue with a brush, (after the Snow Tex dried) and sprinkled Diamond Dust all over each pine cone.  I found Diamond Dust at Michael's.  It's a clear glass glitter.  Sharp, so don't let little toes walk around in it.
If you could see the wreath in person, the glitter makes it look like it has real snow crystals on it. 
Next, I began tediously wiring each pine cone on, by wrapping wire around the back edges and then wiring to the wreath form.  The coat hanger is SO much easier. 
I really love them both.  I had good intentions of selling these at the boutiques, that's why I went a little nutty over making them. 
 They were too much work to sell. I will just have to keep them!  Shucks!


Funky Junk's Saturday Nite Special

Monday, November 15, 2010

Winner Of The Pink Fig Photography Giveaway!


And the winner of the fabulous photo session with
is # 7
Linnea!
(We live in the area and we love family pictures!)

Congratulations Linnea!

If you missed your chance to win and you live near Utah, Chelsey is offering a special!
Just mention Crafty Sisters and you will receive 20% off the Holiday Special
price posted on her website!

Go take a peek!
Chelsey Sorensen
at

Thanks Chelsey for offering such a great giveaway!!
Related Posts Plugin for WordPress, Blogger...