Tuesday, October 30, 2012

Halloween Owl Wreath and More!


We are busy getting ready for Halloween around here. We are tackling the costumes, cookies, school parties, and hanging the last few spooky decorations.  I found a fun owl at Cost Plus earlier in the season with the intentions to hang it on a wreath of some kind.  Sadly it is the day before Halloween and I am finally get around to making it.  I gotta have something fun on my door for the trick or treaters!

I was going to try the "socks on a wreath" again, but they didn't fit around the flat foam wreath without warping the houndstooth.  Instead, I opted for houndstooth fabric, first gluing the fabric to the front of the foam wreath.  Next I pinned and pleated the outside edges and cut the center out leaving enough to pull and pin on the inside.  The fabric didn't quite make it around the inside center, so I cut a long strip of the houndstooth fabric and glued along the bad edge.  I love that I can change the wreath for different seasons.  I just have to figure out something for Fall?  Any ideas?


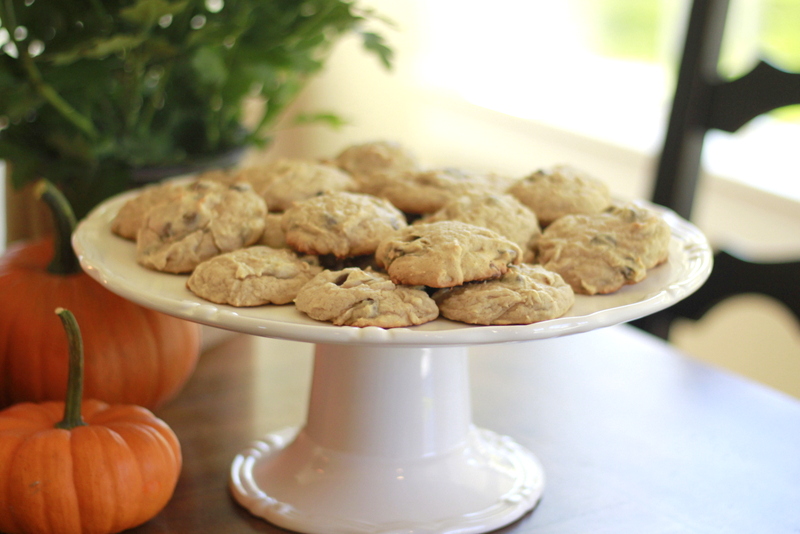
Last night I made several batches of owl cookies for class parties. I stole the owl cookie idea from Kneader's Restaurant and Bakery.  I love their cookies and if I could I would just buy the cookies from Kneader's, but when I need about a hundred it is not very cost effective.  So, I borrowed their idea of backward chocolate chips for eyes and candy corn for noses, and ordered this owl cookie cutter. ( It's only a $1.55 on Amazon! )

*I don't profess to be a cookie artist...actually mine are kinda ugly...but they taste good and my kids think they are fun! Nicole got a good chuckle out of my cookie decorating skills.... 

I have a great soft sugar cookie recipe.  I have tried others - but keep coming back to this tasty recipe.  They are really good with homemade cream cheese frosting.

Sour Cream Sugar Cookies

3 1/4 c. Flour

1 tsp. baking soda
1/2 tsp. salt
1 c. butter
1 c. sugar
1 egg
1 1/2 tsp. vanilla
1/2 c. sour cream

Sift flour, soda, salt, and set aside.  Mix butter, sugar, egg, and vanilla.  Add sour cream and 1/2 of flour mixture and mix.  Then add remaining flour and finish mixing.  Divine in half and roll out.  Cut out cookies and bake on ungreased sheet for 8-10 minutes at 375 degrees.  Do not over bake them! The edges should just barely be golden and the cookies should look firm.

Frost with cream cheese frosting, I like to use Glorious Treats' Cream Cheese frosting, it is a winner!


And last, a silly handout for my son's class.  My boys love whistle lips, they will entertain them for hours.  Thankfully for my ears - they are not too loud. We touched off the Frankenstein with a pixie stick for bolts. 

I am officially tired and it is only the beginning of the Holidays!  Nicole is whipping up another awesome costume for her daughter, she will be back soon to share!

I hope all of you have a "Franken-tastic" Halloween and be safe out there! :)  

(Our thoughts and prayers go out to all of those affected by the hurricane, we wish you safety and a quick recovery!)


Saturday, October 27, 2012

Halloween Caramel Corn

Here's a super easy Halloween Caramel Corn Recipe you'll want to add to your recipe file!
Even better~it's made completely in the microwave!

This week we had our Halloween Activity with my Sunday School Girls
and my Teaching partner Jill shared the most wonderful Caramel Corn Recipe that was "To Die For"!

Not only was it really easy to make, it tasted really good!
Jill has sooooo many brilliant ideas~I love working with her and learning from her too!

Here's the recipe:
Microwave Caramel Corn
8 quarts of air popped popcorn (1 1/2 cups unpopped)approximately
1 Cup Butter
2 Cups Sugar
3/4 Cup Powdered Whey
1/2 cup Karo Syrup
1/4 Cup Water
1/2 Tsp Baking Soda

Melt the butter first in a large bowl.  Mix in butter, sugar, whey, Karo syrup and water with a whisk to thoroughly mixed. Cook for 4 minutes on high heat in the microwave. Make sure that it doesn't boil over.
Remove from microwave and add 1/2 tsp of Baking Soda. 
You can also add a few drops of food coloring if desired.
Add popcorn and caramel mixture together in a large brown paper bag, 
making sure to coat everything evenly.  Fold over top and cook for 2 more minutes on high.
When done spread it out onto a clean counter top or cookie sheets to cool.
Now when I say Whey Powder~this is what I'm talking about.
I searched 3 different stores until I figured it out that this is what it was. 
                        
You should have seen the perplexed look on my hubby's face when he saw this on the counter
with my popcorn making supplies.:)
This Popcorn is going to "Pump You Up!"
                                     
Just kidding~can't help referring to the good old SNL days!
We added in some yummy Caramel Apple flavored candy corns which believe it or not, 
are actually good tasting!
We also had our girls make these cute Witch Broom Party Favor Bags which I know you've probably seen all over Pinterest because they are so darn cute!
They were really easy to put together so make sure to find the full directions for them over with Martha:~ Martha Stewart Witch Broom Party Favors  
Make sure to add a cute tag and you are good to go!
They were so tasty I now have a demanding child insisting on making one for each of her classmates for Halloween!  Sure....I'll somehow fit that in with making her costume and putting together the party for her class in the next 3 days......May the costume making odds be ever in my favor!

Wednesday, October 24, 2012

Monster Soda


I totally blame this project on my three year old son who likes to watch The Muppets over and over again.  He kept pointing out to Nicole and I as we decorated the bottles, which monster he loves and "does not" love.  Of course, the monsters that closely resemble Beaker and Animal are his favorite.

Nicole and I made Rootbeer Reindeer a couple years ago and thought it would be funny to make scary sodas for Halloween to hand out to friends.

We started with a couple different varieties of soda in monster colors.  

We used everything from feather boas to googly eyes to create the monsters.  The pipe cleaners with stripes are especially fun,  Hobby Lobby has a great selection.


 Printed labels cover the original soda labels.
We love the quote "EAT, DRINK, & BE SCARY"!

A little black fur makes the perfect uni-brow for this soda monster.


We love a craft that makes us laugh!  

Nicole and I have a couple more things to share with you this week so stay tuned....

Monday, October 22, 2012

eyeball gumball necklace


This week we are getting ready for school Halloween parties.  
We have a couple of Halloween ideas to share with you, hopefully each day...but don't hold us to it.  Our children, laundry and husbands beckon us... 


First up, an eyeball gumball necklace made from a store bought candy necklace.  
Kinda gross, but the boys love it!


I picked up a really cute gumball necklace at our local Holiday House Boutique.  The necklace is made by Emily, she will be selling more at the next boutique on November  9-10th & November 16th-17th.  I love it and had to ask her how she makes them.  She uses a dremel bit to drill holes through the gumballs and then weaves ribbon to create the necklace.  

Sadly, it doesn't quite work for my boys....

I stumbled upon some gruesome candy eyeballs at TJ Maxx, I thought they were funny enough to buy and I knew my boys would get a kick out of them.


Yeah...they are pretty gross and bloody.  I could have done without the blood, I like happy and cute Halloween.

To "cuten up" the gross eyeballs,  we added them to store bought candy necklaces.  


Next, we drilled through the eyeballs.  
(Clean the drill bit and either use a dremel or a controlled speed drill.  Watch your fingers!
Hold the gumball with a good set of pliers and to avoid scuffs, use a soft towel between the pliers and the gumball.  Drill on a cutting board or a piece of wood to protect your work surface.)


The candy necklace elastic was a little too short for us to work with, so we cut a longer piece of new elastic thread. We used a needle and it was much easier to string the candy.  Bead the candy and gum balls on and finish with a tight knot. Super easy!


They are a hit with the boys and will be so funny to hand out to their friends!
If you are looking for gumball eyeballs, we found some over at Oriental Trading Co.
Another option is to use edible cake/cookie decorating markers and make your own eyeballs on white gumballs.


We have a several more easy Halloween ideas to share, so come back soon!

Monday, October 15, 2012

Orchard Adventures


What do you do when your kids are out of school?
Last week ours were out with Parent/Teacher Conferences
so we decided to have a day of adventure.
 
Growing up in our family we had one solid and true tradition~
Homemade hot buttery popcorn and grape juice along with the Wonderful World of Disney
every Sunday night.
 
Now it wasn't just any grape juice.
Our parents were huge canners and each fall they made their own homemade grape juice.
Each precious jar held enough juice for each of us to have one cup~and boy was it savored from start to finish.  So my grown up quest began.  Now that our parents live close....so does their distiller....
 
Last weekend in my efforts to find Concord grapes
I stumbled upon the most quaint little farm (well that's if you call 80 acres little!) on Craigslist.
The farm had an apple orchard filled with a dozen different varieties,
some of them the most delicious and crisp apples we've ever had.
After growing up in Washington we have a pretty good idea about what makes a good apple,
these apples were not only beautiful they were also delicious!
Our kids had the opportunity to pick grapes for the first time.
They were completely fascinated with a walnut tree~
Candace's youngest even tried to plant one right there on the spot to grow another one.:)
Each of our kids got to pick out a pumpkin and me~
Well after a few hours of brewing.....
I have 30 quarts of Concord grape juice and a wonderful tradition to continue with my own family.
 

Friday, October 12, 2012

A Winner And Something Creepy....


Hooray we have a lucky winner for our fabulous 
Goose Creek Candle Giveaway!
Comment #13
auntiejenni said...
ooooh....i think autumn or the warm Christmas...or even the cute little pumpkin jars...all i know is something autumn-y. thank you for the chance to have a wonderful candle...

We also thought it would be fun to share another of the fun projects from our Fall Boutique.
It was another project inspired by those cute K&Company stickers and paper we found at Michael's.
                                        
We just loved the tilt of each of the tombstones and the fun fonts of the chip board letters.
The tombstones were cut from 3/4" MDF, painted, mod podged with
cute paper and glued onto a 2x3" board.
Thanks goodness for You Tube and tutorials on how to cut out chipboard on my Cricut!
My daughter had so much fun helping to glue on the "creepy" blackish excelsior that looks just plain wicked!

The kids have been out of school the last couple of days for Parent Teacher Conferences so life is a bit hectic~but we did get out all the Halloween decorations and got them put up, plus we had a fabulous fun outing today we'll share as soon as Candace downloads her pictures!
Hooray, we love Fall!  Even if it is a little "Creepy"!!!:)


Monday, October 8, 2012

Wood Witch Silhouettes


Feeling Witchy?
We couldn't pass up making some fun Wood Witch Silhouettes
after seeing the My Mind's Eye Halloween paper this year.
We had so much fun earlier this year making silhouettes for our kids- that
this project was a definite "to-do" on our Halloween craft list!
My Minds Eye's Haunted Paper Pad had all sorts of wicked silhouettes
and the witches were just calling out~cut me...cut me.....
(We found this MME 6x6 paper pack at Michael's Craft store.)  We had trouble finding it online.


After blowing the images up on the computer, they were traced and cut out of 3/4" MDF.
MDF is so great to cut detailed work out like this because it cuts like butter
and doesn't chip or splinter like pine wood does.  (Be sure to wear a good mask when cutting MDF!)

I found myself cackling out loud as each wart, each rotten tooth and crazy curves on the hats were cut.
These Witchy gals are creepy and fun!
The witches were then coated in a semi-gloss black spray paint,
making sure to sand lightly between coats for a smooth finish.
Then they were finished off with a quick alligator hook on the back for easy hanging.

I made a few of these up for the boutique secretly hoping they wouldn't sell so I could keep them all to myself...but it looks like I'll be out cutting some of these ladies again!


Aren't they so fun paired with these witch potion making ingredients? We found the bottles at Hobby Lobby, and the potion labels are from The Graphics Fairy.  She always has great Halloween graphics you can easily find and print!  

*If any of you don't want to give these witchy silhouettes a try on the scroll saw, I cut out extra.  
Just contact me here!

Our Goose Creek Candle giveaway is still going on!  Hurry and enter to win a yummy scented candle, perfect for the fall season! 

Thursday, October 4, 2012

Goose Creek Candle Giveaway and Applesauce Cookies


It's no shocker that we are drawn to scented candles that remind us of food.  We love food, especially baked goodies in the fall. Anything that makes our home smell like we have been baking for hours is a winner in our book! The smell of baked treats without the temptation of calories!

We were lucky enough to be sent a yummy scented candle by Goose Creek Candle Company.  The scent is Apples & Spice, could it be any more perfect for the Fall season?  The candle smells great and lasts for hours, and is not too over-powering.  We also love the look of the container, so sleek and pretty!


I don't know if you have ever heard of Goose Creek Candles, but we love the story behind them.
They are a family owned business and all of their products are poured in the USA with a 100% satisfaction guarantee. Go check out their story when you have a chance.


Goose Creek Candle has kindly offered to share a candle with you!

*Just leave us a comment and let us know what scent is your favorite.  That's it!
Are you a food scent lover like us?

*We also have a discount coupon just for you just in time to stock up for the holiday season!
Just enter COUPON CODE 1050 and enjoy 25% off your entire purchase of Goose Creek Candles
for the whole month of October!

While you are waiting for your candles to arrive, enjoy this yummy recipe that smells and tastes just like Fall!  The recipe is from our good friend Stephanie and her mom.  They are both fabulous cooks.  They call them "devil cookies" because you can't stop eating them!


Applesauce Chocolate Chip Cookies

1 C. shortening
2 C. sugar
2 eggs
4 1/4 C. flour 
1 tsp. cinnamon
1 tsp. salt
1 tsp. nutmeg
1 tsp. allspice

Beat first three ingredients together.  Combine remaining ingredients.
Mix 2 teaspoons of baking soda into 2 Cups applesauce
Alternate dry ingredients and applesauce until mixed. 
The mixture will be quite sticky.  Add chocolate chips. (12.oz bag)
Bake at 350 degrees for 10 minutes.

We have some fun news to share!
We are thrilled to be featured in a photo gallery at  People.Com - Moms and Babies. We are sharing our favorite Halloween ideas.  Come on over and take a peek!  Yup, this is a pinch me moment!
Related Posts Plugin for WordPress, Blogger...