Thursday, December 29, 2011

Day 6 ~ Avocado Salad & Happy New Year!


Avocado Salsa
Sauce:
1/3 c. light olive oil
1/2 c. lime juice
1/3 c. apple cider vinegar
2 tsp. dried oregano
1 tsp. salt
1 tsp. pepper

Diced Vegetables:
1 (15 0z.) can corn niblets, drained
1 small can chopped olives, don't drain
1 pinch red pepper flakes
1/3-1/2 bunch green onion, chopped fine
1-2 cloves garlic, chopped fine
3 diced tomatoes
3 lg. avocados, chopped (add last)

Make sauce in a small bowl and set aside.  Mix diced vegetables in a large bowl. 
 Pour sauce over vegetables and enjoy. 

Nicole and I made this the other day and it was pretty tasty! 
  It's a great alternative to regular salsa. Serve with chips and even the little ones will eat this up.
The recipe comes from my friend Trina, she is an excellent cook and a mom to six boys! (my hero)
I will have to share her carrot chowder recipe sometime...it is so good!

Happy New Year! 
Wishing you a fun filled night of friends, family, and tasty treats!


Day 5~ Stuffed Mushrooms

In high school I had a date with a boy I was trying
so hard to impress.
Imagine my surprise when we went to Pizza Hut
and he being all manly had to order the pizza with ham and mushrooms.
I seriously froze in my chair,
I might as well have been on Fear Factor eating creepy crawly things~
yes, that's what I thought of mushrooms.
Well the only thing that date was good for is that it made me love mushrooms!
So here's my version of a couple of recipes I put together
that as my hubby puts it~are the most perfect stuffed mushrooms ever!
STUFFED MUSHROOMS
Olive oil or Pam vegetable spray
1 slice of white sandwich bread
2 T. butter
1 garlic clove
1/2 of one small onion finely diced
sprinkle of garlic powder
4 oz soft goat cheese
2 T. dried parsley
1/4 tsp. red-pepper flakes
coarse salt
approximately 16 golf ball size white button mushrooms

1.  Preheat your over to 400 degrees and lightly oil your baking sheet.

2.  Toast your white bread and crumble it into fine pieces~
can use a food processor to make it really fine.
Add a light sprinkle of garlic powder and salt.  Set aside.

3.  Remove mushroom stems and dice finely.

4.  In a medium saute pan cook butter, onions, mushroom stems and garlic.
Cook until tender. Add in the parsley flakes, red pepper flakes and season with salt to desired taste.

5.  Add onion, garlic and mushroom stem mixture to goat cheese. 

6.  Spoon filling into each mushroom and press the top of the mushroom with cheese mixture into the breadcrumbs.  Place on baking sheet and bake until mushrooms are tender and lightly browned approximately 15-20 minutes.

They are so yummy and cheesy with a kick from the red pepper flakes! 
Too good to pass up!
Enjoy!


Day 4~ Cranberry Salsa


Okay so this one sounds weird but it is seriously delicious!
My wonderful friend Carrie is one of the best cooks I've ever met. 
 She brought this over for us as a sweet Christmas treat
 and I admit I was skeptical and then I devoured most of it.....
Yup, "Lay off, man, I'm STARVING! [ pause ] Diet starts Monday!"
Sorry couldn't resist a bit of Chris Farley!

CRANBERRY SALSA
3 cups fresh cranberries, rinsed, drained (pick out any bruised or mushy ones)
1/4 cup green onions
2 small jalapeno peppers (seeds & ribs removed...
if you like it hot leave in some seeds, I probably leave in 1/8 tsp seeds.)
1/2 cup sugar
1/2 tsp salt
1/4 cup fresh cilantro leaves
1 T. very finely grated fresh ginger (can substitute 1/4 tsp. ground ginger)
Juice from 1/2 a lemon
2 8 oz. cubes Cream Cheese
Ritz Crackers

Place all the ingredients except the lemon juice and cream cheese
 into a food processor and mix until well chopped. 
Stir the lemon juice into the salsa. 
 Refrigerate for a few hours before serving to marry the flavors. 
There is enough salsa for 2 cubes of cream cheese. 
Serve by placing one of the softened cream cheese cubes on a
serving plate then pour 1/2 the salsa over the top. 
Have plenty of Ritz crackers on hand for dipping!

I actually put everything in the food processor and
I added the salt which can be omitted. 
The salt really helps bring out the flavors though.
You want the consistency to be really fine~
It's so good so enjoy!
Candace and I were busy in the kitchen this afternoon making a few more
recipes to share, so stay tuned to see what's next!

Wednesday, December 28, 2011

Day 3 ~ Brazilian Limeade & Cucumber Crackers

It's day # 3 trying out appetizer recipes for New Year's Eve.  
I found this recipe in our Church cookbook, but it actually comes from my very talented neighbor, Heather.
She has great taste in everything from food to decor. There are several  of Heather's appetizers in the book, so I couldn't help sharing another one of her recipes, Cucumber Crackers.

Here's what you will need for the Brazilian Limeade:
Sugar, sweetened condensed milk, limes, water, and ice. 
Brazilian Limeade
 2 limes
1/2 c. sugar
3 T. sweetened condensed milk
3 c. water
Ice

Directions
Wash limes, cut off ends and slice into eight wedges.  Place limes in a blender with sugar, sweetened condensed milk, water, and ice.  Blend in an electric blender, pulsing 5 times.  Strain through a fine mesh strainer to remove rinds.  Serve over ice. 
This drink was so yummy. My kids loved it! The sweetened condensed milk added an interesting taste. 
 Be sure to use a fine strainer, or you will be choking on chunks of lime. 
Heather's cucumber crackers were delicious too. 
 I like that it's light to eat along with some of the rich appetizers.
 The Garden Vegetable Cream Cheese also has a kick to it.
Cucumber Crackers
Ritz Crackers
Garden Vegetable Cream Cheese
Cucumber, sliced
Mrs. Dash original

Directions:
Spread cream cheese onto cracker.
Top with a cucumber slice and sprinkle with Mrs. Dash.

How EASY is that? Simple and delicious!
She has a couple more in the cookbook, I just might have to share. 
 Thanks Heather!

Nicole has another great appetizer to share tomorrow!
 

Tuesday, December 27, 2011

Day 2: Cheesy Corn Dip

This yummy recipe comes from
my sister-in-law Autumn.
Now that they are on the west coast
her and her little family have made the trek up to Idaho
for New Year's for the last couple of years.
My poor hubby has the misfortune of a December 31st birthday
so it has always made his day to have someone actually want
to come celebrate it with him
and cook him some good food!
Autumn comes ready to go
with almost a dozen tasty things to make up
that not only suffice for New Year's Eve
but for many days to follow.
This recipe is by far one of my favorites
and I've made it A LOT throughout the year
plus my picky eater daughter will gobble it up!

Cheesy Corn Dip
(No we are not sponsored by Walmart,
I simply went there today to check out the after Christmas clearance
and got my cooking supplies.):)

1 can Rotel tomatoes, drained
1 can corn, drained
1 can hominy, drained
1 tsp chili powder
1 tsp garlic powder
A  handful of finely chopped fresh cilantro
Salt/pepper to taste
1 8 oz package cream cheese
2 cups shredded Mexican style cheese
Mix all together, place in dish and bake until bubbly and hot in a 375 degree oven.
Serve with chips and salsa for extra kick!.
If you can't find Rotel tomatoes, any can of stewed tomatoes with chilies will work.
I admit I was a little nervous of the hominy too!
I had never tasted it before but it adds such a fun texture to the dip
I know you'll fall in love like I did!

Monday, December 26, 2011

Wet Your Appetite ~ Caramel Dip

Now that Christmas is over we are looking forward to celebrating New Years!
Every day this week we'll be sharing recipes of our favorite appetizers
that we love to do up for New Year's Eve and Day!
We promise that each one is super easy and absolutely delish!
First up is a yummy and super easy caramel dip made from sweetened condensed milk. 
Our sister-in-law from Texas just delighted us last week with this scrumptious treat.
Just take a can of sweetened condensed milk
and heat it in a pot of water over medium low heat for about 2 hours.
If you're up north it will take 2 hours but down in Texas it
takes about an hour. :)
Make sure to turn the can over every ten minutes so it cooks evenly.
(please excuse the gross BBQ'd tongs:))
Let it cool before you open it and then serve with sliced apples
or over ice cream, or anything else your heart desires!
Yummy and easy!
**We came across warnings that the can could possibly explode using the boiling in the can method. If you are worried...please use the double boiler method.  Open can, pour milk into glass dish, set dish over pan of boiling water, stir until thickened.**

Stay tuned tomorrow to see what's next!


Friday, December 23, 2011

Merry Christmas and Barn Wood Hunting!

Last week we went on our first barn wood hunting trip. 
We were looking for the perfect wood to re-create another manger for Christmas gifts.

There's nothing like crafting with old weathered wood.
My father in- law was nice enough to let us scoop up some spare boards off his farm. 
We had to carefully avoid the spooky cobwebs, mildew, old paint, and large rusty nails while hunting.
Good thing our tetanus shots are up to date (he,he) and we wore a hardy pair of work gloves!
Here is my mother in- law's original manger along with some of her quilted poinsettias?  Aren't the poinsettias neat? She is an incredible quilter!
We love this simple manger because it's the perfect size to perch up on our fireplace, and it helps remind us of what the Christmas season is all about.

Here's a peek of the five finished mangers ready to go as gifts for family members!
Have you ever collected or made anything with barn wood? 

Nicole and I would like to wish all of you a 
 MERRY CHRISTMAS
 filled with peace, happiness, family, and friends!!!


Thursday, December 15, 2011

WYLTC?-Wood Manger

We are over at
 today!

Come on over and see how we made an easy to build manger.
Seriously...easy...takes 30 minutes!
They come in handy for all the nativity plays!

Wednesday, December 14, 2011

Three Wreaths


Hey everyone!  
I thought I would share what I put on my front door this year for Christmas. 
 I decided to try out three wreaths with red ribbon.  I have to change it up every year!

The only way I could get the wreaths to stay in place was to add three small Command hooks.
 We just had our front door painted and they were the perfect solution for keeping the paint job.
  I ran the main ribbon down the door and poked holes for the hooks, then hung the wreaths.  Pretty simple!  I made my own bows with the same ribbon.  All the "bow maker" training from when I worked at Michaels long, long, ago came in handy!  I remember rolling my eyes...like who really does this!?

We also want to let you know that Wood You Like To Craft? is going on this week.
 Melinda  from Under My Umbrella made the coolest barn door Christmas tree stand.

  Head on over there and take a peek! 

Saturday, December 10, 2011

Christmas Lollipop Tree

We had to make another lollipop tree for Christmas!
We made the Christmas tree the same way we made the
 except in honor of Christmas, Nicole created and cut out some fabulous ELF shoes. 
What do you think?  I'm thinking we need to find some more ways to use those cute shoes!
Any ideas?

Today I am decorating the tree for the second time! 
 We made it 5 days, and this morning my 2 year old knocked the tree over.
It happens every year! :)

Wednesday, December 7, 2011

Fixed Roman Shades

After several mistakes, and a couple hours of unpicking....the fixed roman shades are done!

Autumn designed fixed roman shades with mitered square trim for my master bedroom. She had a clever idea to cut up a pair of  beige IKEA Merete curtains, to make faux roman shades. They match the merete curtains with trim that I have hanging behind the bed.  I never would have thought to cut up a good pair...or two pairs of curtains in this case, to create roman shades.  This reminds me again of our mother's words, "measure twice...cut once." It looks like my son's room with smaller windows will soon be getting new roman shades! 
I used Google search to find my fixed roman shade inspiration. I came across this great fixed flat roman shade tutorial by Darby: Fly Through My Window, via Centsational Girl's fixed flat roman shade tutorial.  Be sure to check out both of the roman shades made by these talented ladies.  There's minimal sewing involved, a bonus!
 I  found another great tutorial for functioning roman shades at Make Roman Shades.com.  I followed some of their directions for measuring and adding my lining. I made the mistake of using weak drapery lining, and had a difficult time sewing the large amounts of fabric. The window I am covering is about 100 inches wide, with a little curtain overlap on each side.  So, each shade is about 54 inches wide.  They are really large and I had a hard time getting the curtains to tack up straight.  I resolved the problem by adding thin wood moulding with staples, and later drilling holes with curtain string to pull and pleat. I had to make a trip into the JC Penney window treatment department to grasp the entire roman shade concept!
 To add the mitered square trim, I found on Pinterest this GREAT mitered square tutorial by Grosgrain
 After using her pattern, it was much easier to figure out how to space the squares on the curtains. 
Fabri-Tac is such a great product, it makes my life so much easier. 
Can you imagine sewing all the trim on? The glue grabs and bonds quickly too. 
There you go!  Fixed- flat roman shades, a major hurdle down in the master bedroom!
More to come!

Saturday, December 3, 2011

Wood Christmas Tree with Letters

We finally tackled a Christmas craft to share with you!  We are behind this year thanks to a yucky two week stomach bug that passed through most of my kids. This Thanksgiving, I was very thankful for my washing machine, disinfectant, and a carpet cleaner! :)

We have been eyeing all of the Christmas trees made with words and white chipboard crafts on Pinterest, and thought they would be cute on wood.  Melinda from Under My Umbrella made the best 2x4 Christmas trees last year, so we borrowed her idea and added a few "Thickers" to create the words. .
Thickers are basically sticky chipboard letters.  We ran out of the letter E, so we cut a B, to create an E. We didn't want to buy a second package just for 2 letters.  Good thing it's a whimsical font!  
We added a dab of glue, to keep the letters permanently on.
We used a really thick piece of mdf from my garage, found from our construction site hunting days.
My husband will be so happy to have one less piece of scrap wood hanging around in the garage!
A 2x4, 2x2, or a 1x2 would also work.
We cut each block of wood to fit the word. The bottom is around 9 inches and the top, 4 inches. We cut the wood dove and star out on the scroll saw, and added a small block for the trunk. We used chipboard from the back of a paper pack to cut the heart.  With a bit of sanding, it looks just as good? Then we spray painted the entire tree white.  What a super easy wood craft! The hardest part was putting the stickers on straight!

We will be back soon!
Happy Crafting!

Thursday, December 1, 2011

Sassy Sanctuary Giveaway

Krystal over at Sassy Sanctuary
is doing the funnest giveaway today
and you don't want to miss out!
Krystal is one of our Wood You Like To Craft buddies
plus she did a phenomenal blog make over for us!
She is featuring my little wood craft business
and one, yes I said one of the 10 items being given away
is one of our fun Family letter picture blocks!
We always love visiting Krystal's blog
and especially seeing all the fun home projects she's doing.
Don't miss out on your chance to win some sweet stuff!

Monday, November 28, 2011

And The Winner Is!!!


So the lucky winner
of this fabulous Scentsy giveaway
courtesy of Dawn Simpson
our favorite Scentsy gal is.....

comment #32
annemarie
Congratulations!!!!

Thanks to everyone who joined in!
We loved hearing about the scents you love
and consequently our  list of what we  want is getting longer!
Thanks Dawn for your generosity!
Don't forget to go visit her site for all your Scentsy needs!

Monday, November 21, 2011

Scentsy Giveaway!


We thought this giveaway would be
PERFECT
for this week as everyone is getting ready for
the Holidays and all the company the season brings.
We have become seriously addicted to Scentsy products
and it doesn't hurt that they are made right here
in the town we live!
Just ask our family what they got for Christmas last year!:)
Our good friend Dawn is not only the kindest and sweetest gal
and mom to 3 adorable kids with another on the way
but she also just started up as a Scentsy Consultant
and was kind enough to offer this wonderful
giveaway for one of our lucky followers!

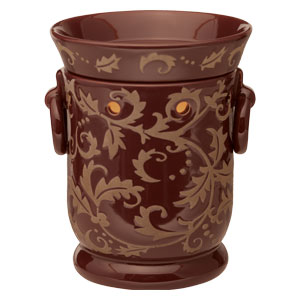
Dawn is offering this November's warmer of the month
PLUM GARLAND
and a bar of the scent of the month too!
MIDNIGHT FIG!
The Giveaway is going to run until Saturday night when we'll pick our winner!
So here's your options to enter!

1. Leave us a comment with your name and an email
to contact you back if you win!

2. Tell us what your favorite scent is!

3.Follow us on Crafty Sisters!

4. Follow us on Facebook!

That's 4 chances to enter!
Make sure to check out Dawn's Scentsy web page
where you can easily order your Scentsy
and have it shipped directly to you!
If you have any questions or would like to
host a party and smell all those fun scents
Dawn is your gal!

We are excited to see what scents you guys like!
Some of our favorites are:
Camu Camu
Hazelnut Latte
Blueberry Cheesecake
& Pumpkin Roll

Happy Sweet Smelling Holidays to you
and make sure you enter to win!!!


Thursday, November 17, 2011

Family Picture Block-WYLTC?

Hey everyone!
  We are over at Wood You Like To Craft? today!
This month's theme is FAMILY.
Come see our family letter picture holder we made. 
Are you looking for homemade family inspired gifts for the Holidays?
Here are some ideas that you won't want to miss!

wood you like to craft?

Monday, November 14, 2011

Guest Posting at Tattered & Inked

 
We are guest posting over at
today! 
 Come check it out!
I got a little distracted from the room projects making Christmas banners and a pueblo for my son's class. 
He looks happy about it, doesn't he? 
We made his pueblo out of Capri Sun boxes, and slathered it with Sculptamold
 Awesome modeling compound, by the way.  It sticks to about everything and dries quickly. 
My hot glue gun and reindeer moss came in pretty handy too!

I had a problem with the faux roman shades yesterday,
 but after a trip to the window treatment center in JC Penney, I think I'm back on track!
Hopefully I will have those shades up and hanging by tonight!
See you soon!

Saturday, November 12, 2011

For The Birds...

Okay, I revamped the bird artwork I was working on yesterday.  Who knew what I thought would be the easiest project on the list for the bedroom, would turn out to be the most time consuming! 
I am still in the process of gold leafing the frames, so these pictures are only with mats. I have never gold leafed anything before. In the beginning, I was so worried about handling the fragile gold sheets. Then I became a little more confident, and whipped right through 3 frames.  Now I'm wondering what else can I gold leaf? Hmmmmm.
Autumn thought I could knock-off the Ballard Design bird pictures for the room, except add gold leafing to existing frames.  Much, much trickier than it looks. One wrong slip with the scissors and you have a weird looking beak and bird! :) 
 I did bookmark this Ballard Design knock-off  by Lindy from Cottage Hill, when I saw it on Knock-Off Decor several months back.  It was a life saver and she did such a great job with her birds.  I can REALLY appreciate it now! Lindy also shares a printable if any of you want to try this. No ugly beaks if you use her copy.  I started tweaking mine a little...and got off course!

 I'll be back on Monday to share more projects for the room, and a better picture of the birds with frames. 
  I need a day of rest...and  I also get to help my son build a pueblo diorama due Monday! 
 Such procrastination! :)
Related Posts Plugin for WordPress, Blogger...