Friday, February 26, 2010

Cutesie Wootsie VS Fancy Schmancy

I have envied Candace's Ornament Hanger from the moment I saw it!
Ooooh, the plans I had......
I finally got my version done!
Isn't it funny the things that inspire us?
For me it was some cookie cutters!
I traced them onto wood and cut them out.
And then I had fun decoupaging my left over scraps of paper and doo dads onto them.

And hello GLITTER GLUE!!!
I love cutsie wootsie stuff.....

So, Candace and I went craft hunting this week or better known as "shopping".
We are always looking for something fun to make and do together
and boy did we find some cute ideas!
We couldn't write them down fast enough!
Hence the conversation started about our styles and probably why
we have so much fun together making stuff 
is
I'm Cutesie Wootsie & she is Fancy Schmancy.
There's nothing wrong with either one and usually when we get together we find common ground.
But no matter what I do, I usually end up back at Cutsesie Wootsie.
So which one are you???


Thursday, February 25, 2010

It's That Time Of Year

Mmmmmm....the stores are filled with Easter candy. Cadbury Mini-Eggs! Nicole and I have loved these for a long time. They are deadly on the waist line.
Love them! Which brings me to this little decoration
 The other day Nicole and I visited one of our favorite home decor stores.  In the Easter section we found a funny little decoration. 
It's really quite odd, but my eyes were drawn to it. 

 Maybe it's from staring at all the nest and bird decorations in blogland. :)

Of course I have to try and make it instead of buying it!
So I found at our new and fantastic Hobby Lobby, these ceramic eggs.  Is that what they're called?
I painted the egg cream, flecked with watered down brown paint and dabbed with a towel.
Next I used a wooden candlestick and one nest.
To add a little oomph, I cut up a few pieces of wood and used it as a base. 
 did this with her bed spindle candlesticks. Cool idea.  It makes them more substantial. 
I glued them together. 
Sprayed it black.
Gathered some "nesting" materials.
Wove them into the pre-made nest to give it a more authentic look. 
Hot glued the egg on top!  Whaddya think?
Is it a little strange or do you like it?
An EGG on a NEST...on a candlestick!
I can't claim the idea as my own, but it was fun to copy.
When I was making this it reminded me of something I couldn't put my finger on.
Cadbury Mini Eggs! 
Soft, pastel, brown flecked mini-eggs.
So, I took some extra ceramic eggs and made some BIG (mini) eggs.
I thought they turned out cute.
(I like my yellow better)

Now, I need to keep myself from eating the rest of the bag :)

Sharing with
Beyond The Picket Fence

Monday, February 22, 2010

I bought a what?

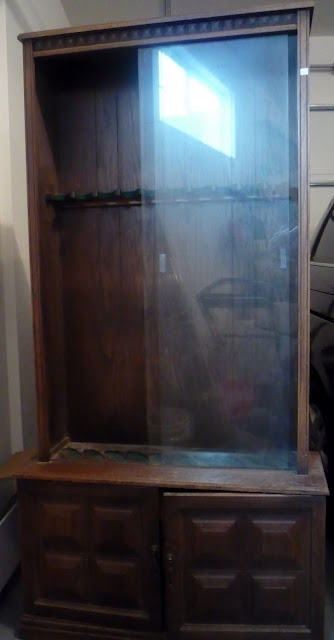
Yes, I did pick myself up a gun cabinet at the thrift store a few weeks ago.
Why?
Because I have seen one redone and I thought it was really cool.
This thing was really, really dirty.
I had to first hammer out the gun shelf and then place thin wood over the bottom where the guns fit.
It's really a well made cabinet.  I felt bad about painting over wood, especially when my primer fizzled and splattered all over, ruining the future paint finish.
I gave it some crown moulding, it always makes everything look a little fancier.
 Plus, I'm getting pretty good at cutting it.
I also added three shelves, because I want it to be a bookcase to go in the office.  
I thought I was going to use my mistint that I found for two dollars, but it was a  too dark.  I ended up choosing one of Martha's gray colors. There's quite a bit of gray in my home, so I think the cabinet will fit in nicely. 
I do need to tell you about these incredible rollers they are selling now.  I believe they are called smooth surface rollers.  They don't leave bubbles and the edge is foam so it can roll right into those tight spots.  Maybe I'm the last to know about these, but I really like them.   
Next I distressed and glazed with black.  I had to cover my crummy prime job and this seemed to do the trick. 
The cabinet came with doors and my first instinct was the get rid of them.  Then my mom told me to save them to keep the dust out.  
Here it is decorated with a few things. 


The glass doors were not very pretty, so I picked up some frost paint at Home Depot and attempted to make square patterns. I wanted to frost the doors because this cabinet is in the office and I have a ton of not so cute books I would like to hide.

I used extra contact paper, because I didn't have any tape with the right width on hand.  I first made a grid with dry erase marker so I could align the squares evenly. 
Here's the glass all sprayed.  This stuff is really tricky.  I wasn't very careful and it dripped and left dots, then when I went to pull the paper off, some of the paint pulled up.  Luckily it scrapes off really easy with a sharp blade.  I did spray on the inside, so little hands aren't tempted to scratch away! :)

I don't know if I really like it that much, but I can always remove them....or the paint. 

This cabinet fits nicely in the office. My decorating skills need some improvement.....I'm better at making things than decorating them....:) Do you think I should keep the glass doors? 


****My mom gave me her opinion on the finished cabinet.  She thinks the square pattern in the frosted glass fights with the square pattern in the wood of the cabinet.  I think I agree.  If I keep the glass I think I will frost the entire thing. From what I can tell from the comments so far, the opinions are mixed.  I do have to say overall- it does look much better than when it started, glass or no glass !


Linking to


Funky Junk's Saturday Nite Special

Furniture Feature Fridays
The DIY Show Off

Sunday, February 21, 2010

Remember Me???

How could I forget?
I've been trying to get up the courage to hang this baby up
and I finally did it.
It wasn't the task in itself that scared me....
it was the weight,
the crashing images that raced through my head and having to undo all the computer cords and figure out how to put them all back together as I rearranged my little office space.
I went and bought all the little hooks, super wire, and screws that would be the perfect recipe for success.
I marked some marks, found the studs and used my beloved level to get it straight.

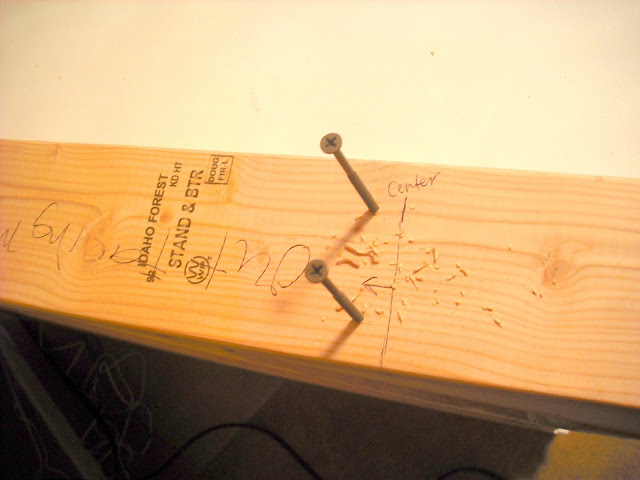
I ended up using a 2 x 4 I trimmed down to fit in the back to hang it on which I screwed into the studs and also add more stability as I screwed in from both sides.

I predrilled the holes and still ended up with these.....nothing a little spackel can't handle!

I put a few things on it to display until I figure out what I want on there.
But for now.....it's perfect and I'm feeling a little proud.....
And yes....my Big Stud helped me!

If you've been wondering why we Crafty Sisters have been MIA this week....
read the funny bit about Candace's carpet cleaning experience.
Even funnier is how scared she was to deal with the carpet man coming back so her hubby recommended she call her tough big sister to deal with him.  Is that a compliment?  I'm still laughing about it.:)
One of her kids officially broke her first window.....
I got my Easter Letters all done that I'm teaching a class on for next month.  Phewww.
So this week get ready for Candace's big reveal, some more fun Easter Decor and who knows what else we'll get an itch to do!
Happy Sunday!


Related Posts Plugin for WordPress, Blogger...