Showing posts with label projects. Show all posts

Wednesday, February 2, 2011

Pottery Barn Art Boards

In case any of you guys missed our guest post over at Infarrantly Creative
we thought we'd post it again here at home!
Here's our latest project we've been working on.
Do you recognize these???
Here's our source of inspiration~~
These bad boys go for $169 a piece, yup each, so that would be a
grand total of $676 for 4.
Let me go grab my wallet......  
Yeah.
So here's where we started.
We printed off the picture and tried to measure them to scale.
If you don't own a quilting ruler, go get one, they are so useful!
We got 7 2x4 foot 1/4 inch MDF boards.
Home Depot was so good to cut everything out for us!
We used printer paper to make our patterns, which worked great
since it was already 11" high, we taped 3 sheets together to fit the 24" width
of the board and eyeballed the rest from there.
2 of the boards were cut into 3" slats,
1 was for the house tops
and the 4 remaining were for each house base. 
Each school house was 48" high except for the red one so we modified the pattern
to maximize the use of our boards.

I know looking at these it might seem overwhelming but remember...
YOU CAN DO IT!!!!
We know a lot of us get a bit nervous around tools,
but we Crafty Sisters really want to encourage you not to!
The jigsaw was one of the first tools we tried and it's pretty user friendly!
For this project you'll need:
A jigsaw, a drill, liquid nails or wood glue, paint,
sand paper and some clamps would be really useful!
(Although I have to admit my pantry was completely raided to clamp all of these down!)
We made the top portion 11 inches high.
Side slats were cut at 35 inches, the bottom was 24".
We used some 1x2" trim moulding for the chalk tray at the bottom.
It's easier to be exact with the roof line by layering the top piece,
 gluing it to the main house and then cutting it exactly. 
Less cuts, nicer finish.
Spray paint works best and gives the best finish!
Did you know that if you lightly sand between coats
it will make your finish look even better?!
Also following the directions on the back is always good (note to self).
Don't get too close and glob the paint.
It's better to do several thin coats then ruin it with one globby one.
Spray painting in cold weather isn't fun.
It stinks. Literally.
We're hoping the hubby doesn't notice the over spray of red on the garage floor.:)
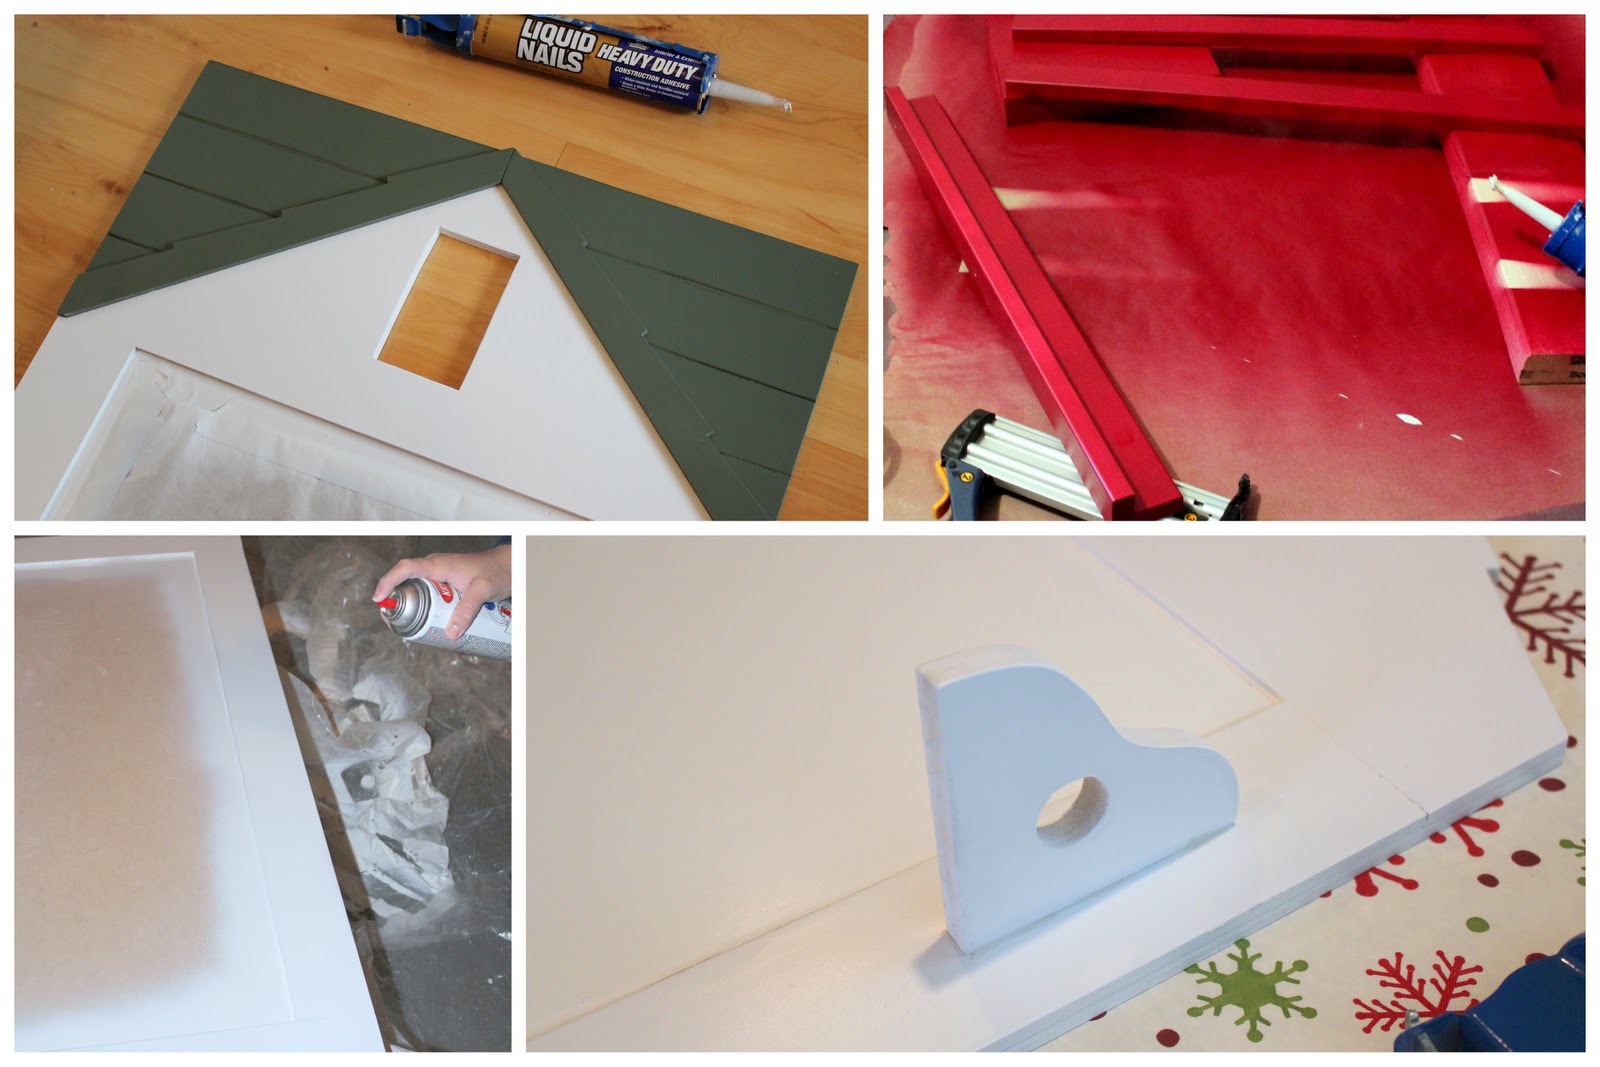
Each house was then either inlaid with dry erase board,
cork board, or painted with chalk board paint. 
If using chalk board paint we recommend pre-painting the side slats and
then gluing them into place so you don't get chalkboard paint all over them.
Scared to cut dry erase board?  We were too!
Luckily we remembered a great tip we saw used on trimming doors to protect them from chipping:
Make sure to tape along the line before you score~
this will eliminate any chance for the finish to chip and flake up!

We also found a roll of white craft paper to hang from a dowel that
was held on by little corbels we made that attached to the base.
A little liquid nails holds everything in place
and spray adhesive worked great for the cork!
We attached "d" rings to the back for easy hanging.
All these things can be found at your local craft and hardware store.

We had to make one in pink for Nicole's daughter to display her
artwork and to organize her jewelery!
Candace's boys didn't need any coaxing to try them out either!
 These were pretty fun to make and actually pretty easy
but more importantly our kids love em'!
Plus our grand total was just over $75.
That's total....for 4!
Pretty fun huh?
Now, what to do next.....

Saturday, May 8, 2010

Faux Patina Birdhouse

 
There's a DIY Club Blog Hop going on! 
We thought we would join in the FUN!!!
~~there are prizes for the winner too! 
I don't know about you, but we could always use more glue!
To participate you must use one of the vendor's products on the project entered.

We chose Gorilla Wood Glue to use for our project.
 We have never tried it before and I do have to say...we are pleased!
The set time is so incredibly fast!


We decided to "embellish" a small birdhouse into a super duper mansion birdhouse
....fit for a king....well bird, and maybe a couple of his buddies....
Our inspiration came from a picture of a copper coin with great patina that I found on 
Wikipedia.
 ( my source for all of my unanswered questions! :) 

I wanted to see what true patina looks like and this is the example they gave.
  The colors are gorgeous!
We thought it would be cool to give a simple birdhouse the same colors,
 and add some bold color to my backyard. 
Real copper would have been SWEET....but......
have you seen how much that stuff costs?
Faux will have to do.
We started with this fancy unfinished birdhouse.
It's made to hang on a tree, but we've been a little obsessed with perches lately....
Although it looked large in the store- it looked
like an itsy bitsy birdhouse on our intended perch. 
So here's how we enlarged it!
We started by mimicking the base of the birdhouse by cutting 1x2's at 30 degree angles.
We always have a couple of 1x2's lying around....you never know when you'll need them!
Plus they're super cheap!
Then we built up and out.
 Each piece was glued together with Gorilla wood glue. 
  The set time was SOOOOOO fast!
This is the third layer of 1x2's to give it extra height.
Yes.....ADMIRE my fine tools.......
Here is my frying pan "clamping" system.
Did you know frying pans can be used for things other than cooking???
We covered the holes so birdseed couldn't seep down into the inside.
Now we let it sit overnight and I have to say...it was solid!
We added the perch with more
 Gorilla glue
and wood screws,
filled the gaps with some filler and sanded.
We gave everything a coat of durable outdoor paint and
cut a few triangular wedges to add under the perch.
The roof got a "faux" copper roof. 
Pretty ain't it!!!
The base is a post in the ground.  I've never done this before.
Thank goodness for our Dad!  
He said to bury it at least 2 1/2 feet into the ground. 
We probably should have used cement. 
But hey,
I'm always wanting to move things around and redecorate!
Next came the faux finish.
  We mixed turquoise, dark green,  navy blue and copper
and used the dry brush technique to paint the faux patina.   
We just dabbed and dabbed until we found the color we liked.
Wood screws attach the triangle wood pieces to the post.


There you go! 
A little far out for a birdhouse, but it got the "cool" approval from my boys. 
 That's all that matters! :)
Now all it needs are a couple coats of polyurethane,
and maybe some birdseed....

Monday, April 5, 2010

Pegboard Organizing

(BHG)

No, I haven't done this project yet...but I want to! :)
After combing through mountains of craft piles, I stopped at our local grocer and picked up this great
 BHG Special Interest Publication on organizing.
 It's full of cute organizing ideas. 
 I need the "cute" to inspire me to organize my junk.


(BHG)

WOW!  I would love this! 
Let's see if I can make this happen......it's a big undertaking, but my house is in disarray.

(BHG)

What do you think of pegboard organizing? 
Does it belong in the garage- or would you bring it in your home?
Related Posts Plugin for WordPress, Blogger...